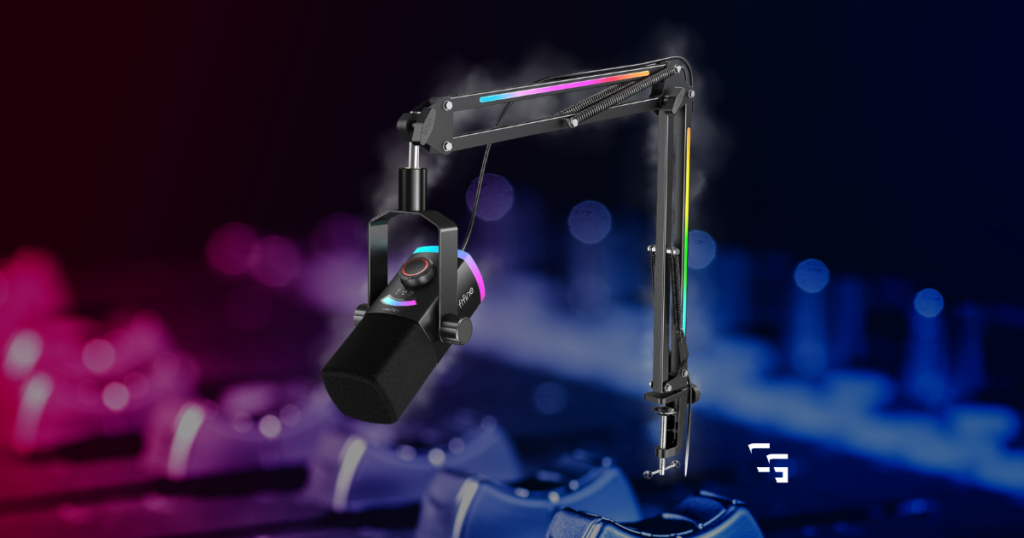
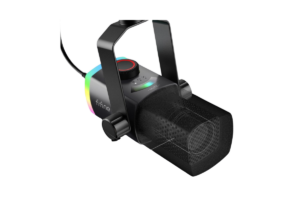
When I first got my FIFINE AM8 PRO-T, I knew it sounded better than the headset microphone I had been using.
I also learned pretty quickly that getting a dedicated microphone is not quite as plug-and-play as using a headset mic.
The microphone itself took me less than five minutes to set up.
Getting it to sound exactly how I wanted in OBS?
That took a little longer.
- I watched YouTube videos
- Tried different settings
- Changed things
- Listened to myself
- Changed them again
- & Basically kept messing with it until I landed on something that sounded good to me.
I’ve been streaming with these settings since then, and I’ve pretty much left them alone.
So if you have an AM8 PRO-T and you’re trying to figure out where to start with your OBS filters, here’s my exact setup.
Some links in this article may be affiliate links, meaning I may earn a commission at no additional cost to you. Also, these aren’t magic settings. Your voice, room, microphone placement and background noise will all affect what sounds best. I’d use my settings as a starting point rather than assuming you need to copy every number exactly.

TL;DR: My FIFINE AM8 PRO-T OBS Settings
I’m using the FIFINE AM8 PRO-T over USB, with the microphone roughly six inches from my mouth.
My gain knob is almost all the way up, and normal speaking usually hits around -12 dB in OBS.
My OBS filter chain, in this exact order, is:
- Noise Suppression — RNNoise
- Noise Gate — -43 dB close / -38 dB open
- 3-Band Equalizer — +2 dB high / 0 dB mid / +2 dB low
- Compressor — 3:1 ratio / -18 dB threshold
- Limiter — -6 dB
That’s what I’m currently streaming with.
Let’s go through each one.
If you’re still deciding if the Fifine AM8 PRO-T is for you, check out my Fifine AM8 PRO-T Review: My First Stream With It
1. Noise Suppression: RNNoise
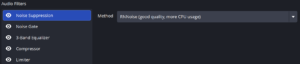
My setting: RNNoise (good quality, more CPU usage)
Noise suppression is first in my filter chain.
I’m using OBS’s RNNoise option.
The point here is pretty simple: I don’t want every little background sound in my office getting picked up while I’m streaming.
My office is small.
Under normal streaming conditions, we’ve gotten the background-noise problem mostly under control with this setup.
Now, when my entire family is packed into this tiny office?
There’s only so much a microphone filter can do.
I’m not expecting OBS to perform miracles.
But under my normal streaming conditions, RNNoise has been working well enough that I haven’t felt the need to change it.
My Noise Suppression Setting
Method: RNNoise (good quality, more CPU usage)
That’s it.
This one’s easy.
2. Noise Gate
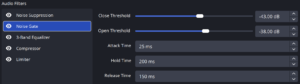
Here’s where things get a little more specific.
My current Noise Gate settings are:
Close Threshold: -43 dB
Open Threshold: -38 dB
Attack Time: 25 ms
Hold Time: 200 ms
Release Time: 150 ms
The Noise Gate basically helps determine when the microphone should open up and start picking up audio versus when it should remain closed.
This was important for me because I didn’t want every tiny sound in the room constantly coming through.
At the same time, you don’t want to go too aggressive.
If your gate is cutting off the beginning or end of your words, don’t assume my numbers are right for you.
Adjust them.
My normal speaking voice is hitting around -12 dB, so these thresholds work well with the way I’ve got My AM8 PRO-T set up.
3. 3-Band Equalizer
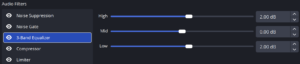
This is one of the simpler filters in my setup.
I’m currently using:
High: +2.00 dB
Mid: 0.00 dB
Low: +2.00 dB
So I’m giving the highs and lows a small boost while leaving the mids alone.
Nothing crazy.
And that’s something I’ve learned throughout this entire process.
You don’t necessarily need to go crazy with these settings.
When I first started researching microphone settings, it was really easy to see a bunch of numbers and assume there was some perfect combination I needed to discover.
There isn’t.
I’m using a tiny adjustment here because this is what sounded good with my voice.
Your voice might sound better with something different.
4. Compressor
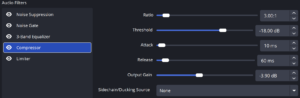
Next up is my compressor.
My settings are:
Ratio: 3.00:1
Threshold: -18.00 dB
Attack: 10 ms
Release: 60 ms
Output Gain: -3.90 dB
Sidechain/Ducking Source: None
The compressor helps control the difference between my quieter and louder moments.
And if you stream games?
You probably understand why I want that.
I can be talking normally one second and reacting significantly louder the next.
The compressor helps keep those louder moments under control instead of having my volume jump all over the place.
The 3:1 ratio I’m using isn’t insanely aggressive, either.
Again, the goal isn’t to process my voice into oblivion.
I just want it to sound consistent.
5. Limiter
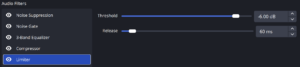
Finally, I’ve got a limiter.
My settings:
Threshold: -6.00 dB
Release: 60 ms
Think of this as my final safety net.
If I suddenly get way louder than normal, I don’t want my microphone absolutely blasting everyone watching the stream.
The limiter puts a ceiling on those loud peaks.
It’s the last filter in my chain, which is exactly where I want it.
Everything else gets processed first.
Then the limiter makes sure the final signal doesn’t go beyond the level I’ve set.
My Full OBS Filter Order Matters Too
Don’t just look at the individual settings.
Look at the order.
Mine is:
Noise Suppression → Noise Gate → 3-Band Equalizer → Compressor → Limiter
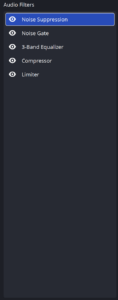
OBS processes these filters in order from top to bottom.
That’s why I wouldn’t randomly drag them around after you’ve got everything sounding right.
- Mine sounds good
- It’s working
- I’m leaving it alone
- I’ve learned that lesson with enough PC settings at this point
My Physical FIFINE AM8 PRO-T Setup
The OBS filters are only part of this.
My actual microphone setup matters too.
I’m currently:
- Connected through USB
- Roughly six inches from the microphone
- Running the physical gain knob almost all the way up
- Normally hitting around -12 dB in OBS while speaking
That last number is much more useful than blindly copying the position of my gain knob.
If you put your gain almost all the way up but you’re screaming into OBS at -2 dB every time you speak?
Turn it down.
Likewise, if you’re barely reaching -30 dB while talking normally, my exact physical settings obviously aren’t working for your setup.
Watch your OBS meter.
Listen to recordings.
Adjust from there.
And because I’m currently using USB, this is also a good place to link my USB vs. XLR Mics: Which Should You Buy in 2026? article if you’re trying to decide how you want to run your own microphone.
Don’t Just Copy My Settings and Call It Done
This is probably the most important part of this entire article.
When I got my AM8 PRO-T, I didn’t magically know what any of this should be set to.
I blindly followed a bunch of YouTube videos. Seriously.
- I’d try someone’s settings
- Listen
- Change something
- Listen again
- Try another recommendation
Eventually, I found settings that sounded good for me.
And then I stopped touching them.
That’s what I’d recommend you do too.
- Use my settings as a starting point
- Make a short OBS recording
- Talk normally
- Talk quietly
- Get loud
- Stop talking and listen to the room noise
- Type on your keyboard
- Move around
Then listen to the recording with headphones
If something sounds wrong, change one thing at a time.
Otherwise, you’re going to change six settings and have absolutely no idea which one actually helped.
Are These the Best OBS Settings for the FIFINE AM8 PRO-T?
They’re the best ones I’ve found for mine so far.
And that’s really the point of this article.
- I’ve used these settings on actual streams
- I like how they sound
- I’ve stopped messing with them
If you just bought an AM8 PRO-T and have absolutely no idea where to start, copy these settings, make a recording and go from there.
Just remain patient. You’ll get it.
The microphone is capable of sounding really good.
Getting there just takes a little more work than plugging in a headset microphone and forgetting about it.
For me?
The difference has been worth it.